Fishbone Stitch: Embroider Leaves with a Natural Centre Vein
Learn fishbone stitch step by step to fill leaves and petals with a natural centre vein. Includes marking, stitch angle and fixes for gaps.
By Ayoub Farid · · 2 min read
Fishbone stitch fills a leaf shape with angled stitches that meet in the middle, creating a natural vein down the centre. It is one of the prettiest and most useful fill stitches for botanical embroidery, and it is easier than satin stitch on leaf shapes because the angle hides small irregularities.
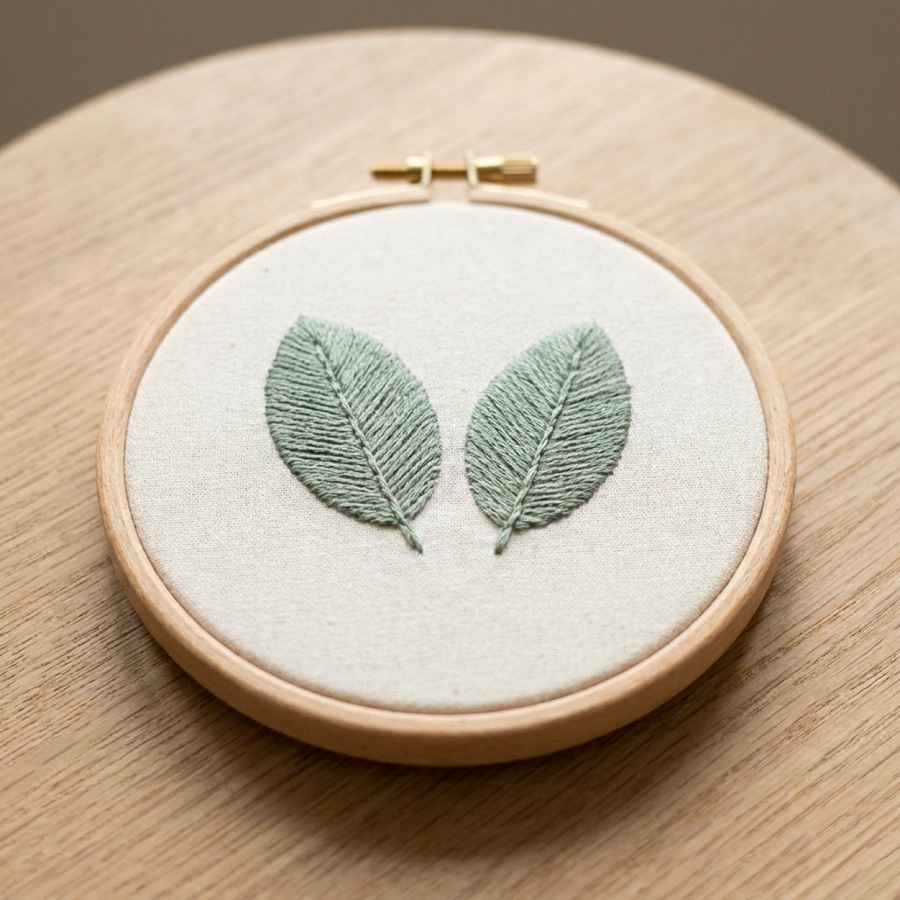
How to do fishbone stitch, step by step
- Draw the leaf and a line down its centre.
- Make one straight stitch from the tip of the leaf down the centre line, about 3 mm long.
- Come up on the outline, just to the left of the tip.
- Go down on the centre line, just past the end of the first stitch, slightly over to the right side of the line.
- Come up on the outline on the right side, beside the previous right-side point.
- Go down on the centre line, just past the last stitch, slightly over to the left.
- Repeat, alternating sides, until the leaf is filled.
The slight crossing over the centre line is what creates the vein.
Tips
- Keep stitches close together at the outline, so no fabric shows.
- Keep the angle consistent on both sides.
- Use 2–3 strands. More strands fill faster but are harder to keep smooth.
- For curved leaves, curve the centre line and let the stitches follow it.
- Outline with split stitch first if you want a crisp, slightly raised edge.
Common mistakes
| Problem | Fix |
|---|---|
| No visible centre vein | Cross slightly over the centre line each time |
| Gaps at the edges | Place outline points right next to each other |
| Leaf looks lopsided | Alternate sides strictly; keep the angle the same |
| Tip looks blunt | Start with a single straight stitch at the tip |
Fishbone vs satin stitch for leaves
Satin stitch leaves look smooth and glossy, but the long stitches across a wide leaf can loosen. Fishbone uses shorter angled stitches, so it stays firm and looks more natural. For a feathery, open leaf, try fly stitch or fern stitch.
Where to use it
Leaves on wreaths and bouquets, petals, feathers and wings. See leaf embroidery for many leaf styles and botanical embroidery for full designs.
Fishbone stitch is in Hoopie's "Flowers & leaves" group, with an animated guide showing the alternating needle points.
Frequently asked questions
What is fishbone stitch used for?
Filling leaves, petals and feathers with a natural-looking centre vein.
How many strands for fishbone stitch?
Two or three strands for most leaves. One strand for very small leaves.
Is fishbone stitch hard?
No. It is a good next fill stitch after satin stitch, and it is more forgiving on leaf shapes.
What is the difference between fishbone and fly stitch?
Fishbone stitches overlap at the centre to make a solid fill. Fly stitches are V shapes stacked along a stem, leaving fabric visible for an open, feathery look.