Stem Stitch: How to Embroider Smooth Curved Lines
Learn stem stitch for flowing stems, vines and curved lettering. Step-by-step needle points, which side to keep the thread, and fixes for gaps.
By Ayoub Farid · · 3 min read
Stem stitch makes a smooth, slightly twisted line that looks like a fine rope. It is the go-to stitch for flower stems, vines and flowing script, because it bends around curves far more gracefully than back stitch. It is also known as crewel stitch or outline stitch (though some stitchers use "outline stitch" for the mirror version, explained below).
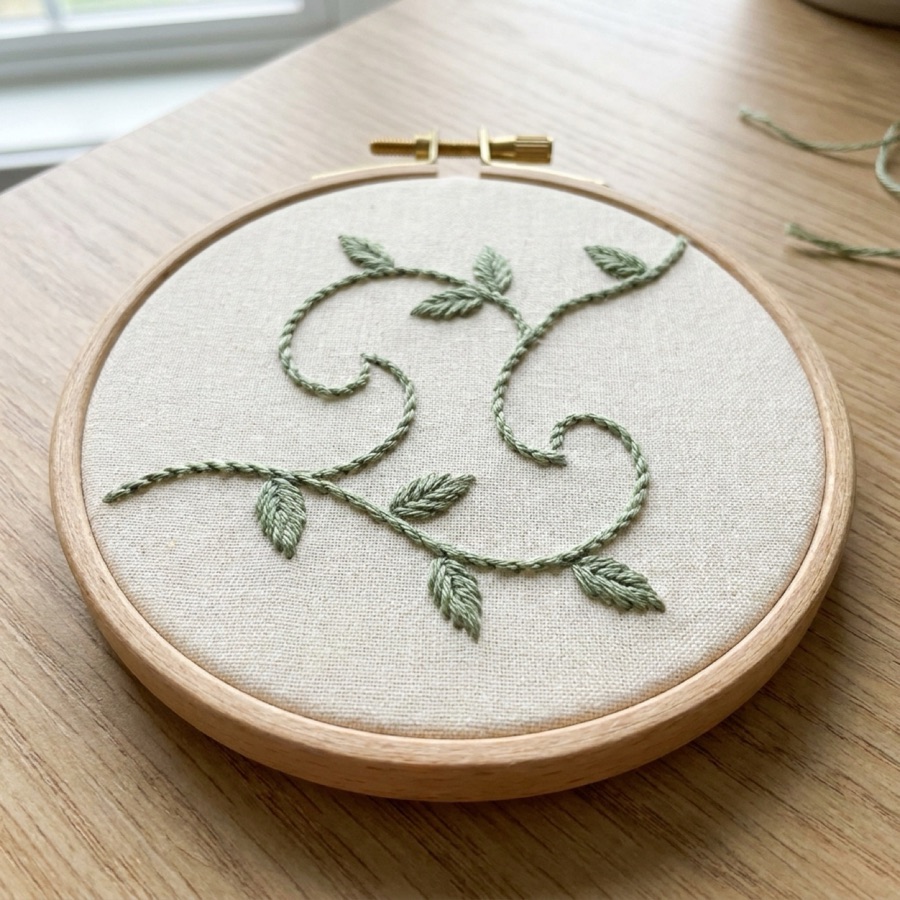
How to do stem stitch, step by step
These directions are for right-handed stitchers working left to right. Left-handers can work right to left and mirror everything (or switch Hoopie to left-handed view).
- Come up at the start of the line (point 1).
- Go down one stitch-length along the line (point 2), but don't pull it tight yet: leave a small loop.
- Come up halfway between 1 and 2 (point 3), just beside the line, with the loop of thread kept below the needle.
- Pull through so the first stitch lies flat.
- Go down one stitch-length beyond point 2, then come up at the end of the previous stitch (point 2's hole or just beside it), keeping the thread below again.
- Repeat, always keeping the working thread on the same side.
The overlap is what creates the twist. Each new stitch starts halfway along the previous one.
Which side should the thread go?
Pick a side and stay on it. Keeping the thread below the needle gives stem stitch; keeping it above gives what many call outline stitch, which twists the opposite way. Switching sides mid-line breaks the rope look, which is the most common stem stitch mistake.
Tips for smooth curves
- On curves, keep the thread on the outside of the curve. This keeps the twist flowing instead of bunching.
- Shorten the stitches on tight curves, just like with back stitch.
- For a thicker line, make the stitches slightly angled across the line, or use more strands.
- Use an even number of strands, such as 2 or 4, for a consistent rope.
Common stem stitch mistakes
| Problem | Cause | Fix |
|---|---|---|
| Line looks like back stitch, no twist | Not overlapping enough | Come up halfway along the previous stitch |
| Twist changes direction | Thread switched sides | Keep the loop on the same side every stitch |
| Gaps or jagged edges on curves | Stitches too long | Shorter stitches, thread on the outside of the curve |
| Thin, tight line | Pulling too hard | Let each stitch lie flat |
What to stitch with stem stitch
- Flower stems and leaf veins (see botanical embroidery)
- Vines and wreaths
- Cursive lettering (see how to embroider letters)
- Outlines that need to feel soft and organic
Stem stitch is part of Hoopie's "Curves & letters" week, together with split stitch. The lesson has you stitch a vine, then snap a photo; Hoopie checks whether the twist stays consistent and whether the curves are smooth.
Frequently asked questions
What is the difference between stem stitch and outline stitch?
They are made the same way, but stem stitch keeps the thread below the needle and outline stitch keeps it above. The twist goes in opposite directions. Many patterns use the names interchangeably.
How long should stem stitches be?
About 3–4 mm on straight lines and 2 mm on tight curves. Consistency matters more than the exact length.
Is stem stitch good for beginners?
Yes. It is slightly trickier than back stitch because of the thread position, but most beginners get it within a few practice lines.
Why does my stem stitch look like a dashed line?
You are probably not overlapping the stitches. Bring the needle up halfway along the previous stitch, not at its end.