Long and Short Stitch: Thread Painting for Beginners
Learn long and short stitch to fill large shapes and blend colours: stitch direction, row-by-row method and tips for smooth, realistic shading.
By Ayoub Farid · · 2 min read
Long and short stitch is the stitch behind "thread painting" or "needle painting": realistic petals, feathers and fur where colours blend smoothly into each other. It looks advanced, but it is really just staggered straight stitches worked in rows.
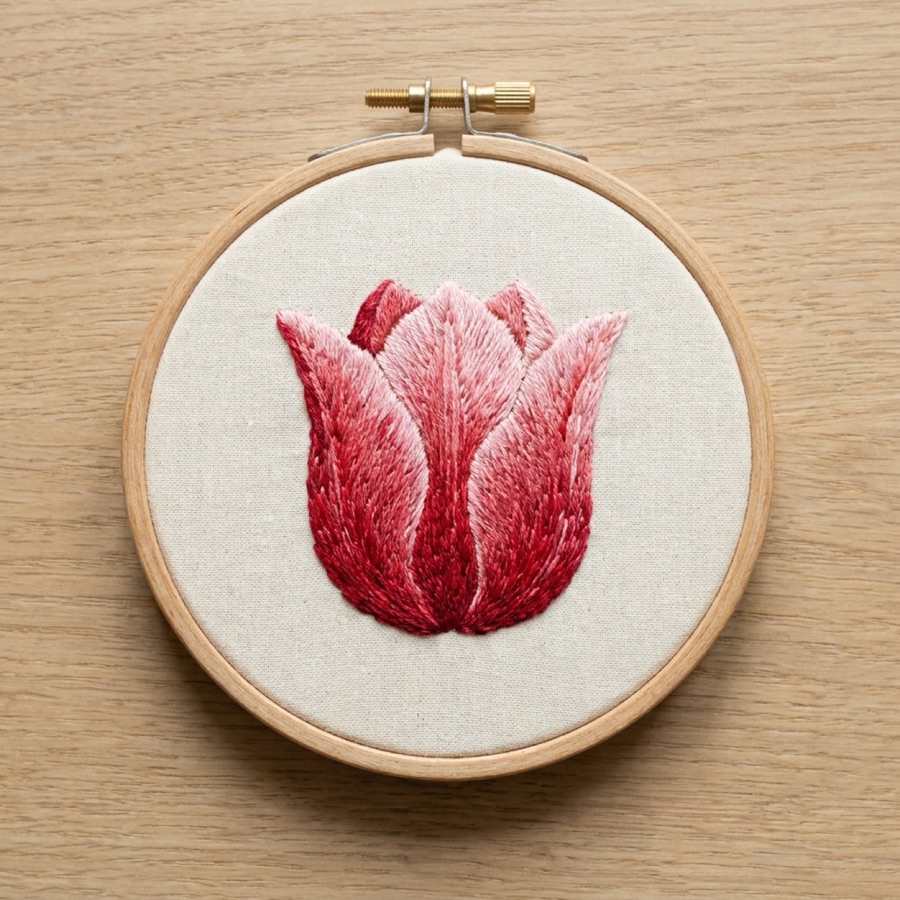
When to use long and short stitch
- Filling shapes too big for satin stitch (stitches would be too long)
- Blending two or more shades smoothly
- Realistic flowers, birds, fruit and animals
How to do long and short stitch, step by step
Row 1: the edge
- Outline the shape with split stitch.
- Work the first row at the outer edge, alternating long and short stitches (for example 8 mm and 5 mm), each coming up inside the shape and going down just over the outline.
- Keep the stitches angled toward the centre of the petal or the direction the shape "grows".
Row 2 onward: blending
- Change to the next shade.
- Come up through the ends of the row 1 stitches (splitting them slightly), and make stitches of roughly equal length going inward.
- Vary the lengths a little so the rows don't form a hard line.
- Repeat row by row until the shape is filled.
Tips for smooth shading
- Use 1 strand for fine, realistic work; 2 for a bolder look.
- Draw direction lines on the shape before you start, and follow them.
- Choose 3–5 shades of one colour that are close together.
- Come up through the previous stitches, not between them. That is what makes the blend invisible.
- Work slowly. Thread painting rewards patience more than speed.
Common mistakes
| Problem | Cause | Fix |
|---|---|---|
| Visible stripes between colours | Rows all the same length | Vary stitch lengths in each row |
| Gaps showing fabric | Stitches too far apart | Add stitches until the area is dense |
| Stitch directions look chaotic | No direction plan | Draw guide lines first |
| Bulky, raised areas | Too many strands | Use 1–2 strands |
A first project
Start with a single petal or a leaf about 3 cm long, using two or three shades. Once you can blend one petal smoothly, try a tulip or a simple bird. For a beginner-friendly overview of this style, see thread painting for beginners.
Hoopie's library includes long and short stitch with an animated guide and the common mistakes (visible stripes, gaps, direction changes) and how to fix them.
Frequently asked questions
Is long and short stitch hard?
It takes practice to blend smoothly, but the stitch itself is simple. Start with one petal and two shades.
How many strands for thread painting?
One strand gives the smoothest, most realistic blend. Two strands are faster and fine for a bolder style.
What is the difference between satin stitch and long and short stitch?
Satin stitch spans the whole shape with single stitches. Long and short uses staggered rows, so it can fill large shapes and blend colours.
What is thread painting?
A style of embroidery that uses long and short stitch with many thread shades to create realistic, painterly images.