Chain Stitch Embroidery: Step-by-Step for Beginners
How to do chain stitch: looped needle points, keeping links even, finishing the last loop, and using chain stitch for bold outlines and lettering.
By Ayoub Farid · · 3 min read
Chain stitch is a line of linked loops, like a little chain. It is bold, textured and very forgiving on curves, which makes it popular for outlines, lettering and the curly script you see on vintage jackets. It is also called tambour stitch when it is worked with a hook.
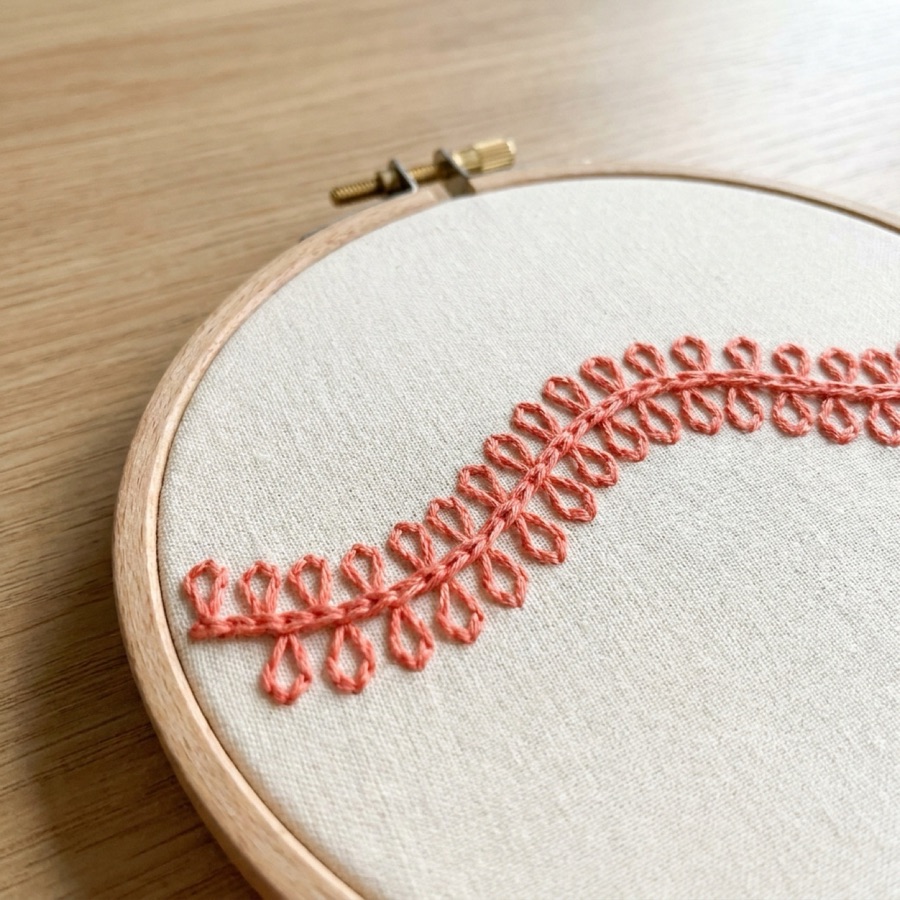
How to do chain stitch, step by step
- Come up at the start of the line (point 1).
- Go back down in the same hole (point 2), but don't pull the thread through: leave a small loop on top.
- Come up one stitch-length along the line, inside the loop (point 3).
- Pull gently until the loop is snug around the thread. That is your first link.
- Go down right beside where you just came up, inside the link, leaving a new loop.
- Come up one stitch-length along, inside the new loop, and pull snug.
- Repeat to the end.
- Finish with a tiny straight stitch over the last loop to anchor it.
Tips for even links
- Keep every link the same length. About 3–4 mm is a good start.
- Snug, not tight. If you pull too hard, links become narrow slits; too loose and they look floppy.
- Use 3–4 strands for a nicely rounded chain.
- On curves, keep the stitches shorter so the chain bends smoothly.
Common chain stitch mistakes
| Problem | Cause | Fix |
|---|---|---|
| Loops pull through to the back | Needle didn't come up inside the loop | Always come up inside the previous loop |
| Links different sizes | Varying stitch length | Keep a steady 3–4 mm rhythm |
| Thin, pinched links | Pulling too tight | Pull only until the loop sits around the thread |
| Last loop comes undone | Not anchored | Tack the final loop with a small stitch |
Variations
- Lazy daisy (detached chain): a single anchored loop, perfect for petals. See lazy daisy stitch.
- Twisted chain stitch: go down slightly to the side of the loop for a rope-like texture.
- Whipped chain: wrap a second colour through the links.
- Chain stitch fill: rows of chain worked side by side or in a spiral to fill a shape.
Chain stitch for lettering
Chain stitch is a favourite for cursive names on denim and sweatshirts because it reads clearly from a distance. Keep links short on tight curves and start a new line at sharp corners. More in how to embroider letters and embroidery on clothes.
Hoopie's stitch library has an animated chain stitch guide with numbered points (1, 2, 3) and a slow mode, so you can watch exactly where the needle comes up inside the loop.
Frequently asked questions
Is chain stitch hard for beginners?
No. It takes a few tries to get the loop position right, but it is very forgiving and looks good even when slightly uneven.
How do you end a chain stitch?
Make a small straight stitch over the far end of the last loop to hold it down, then secure the thread on the back.
What is chain stitch used for?
Bold outlines, lettering, stems, borders and filling shapes with rows or spirals.
What is the difference between chain stitch and tambour stitch?
They look the same on the front. Chain stitch is worked with a needle; tambour embroidery uses a hook, which is faster but needs a different technique.